
ResIOT Helium Hotspots quick start Guide & Manual
Choose your device model and check your hardware setup, components and configuration
Hotspot Hardware Setup
What’s inside the box?
Ports & Connectors
Hotspot default parameters & First connection
The hotspot is delivered with some essential parameters already preconfigured. Below you can find these values
. IP Address: DHCP (Dynamic)
. ResIOT® Web Panel Address: http://[your_hotspot_ip] (example http://192.168.1.116)
. ResIOT® Web Panel Password: printed on silver label sticked to your hotspot
. Eth MAC Address: printed on silver label sticked to your hotspot
. Wifi MAC Address: printed on silver label sticked to your hotspot
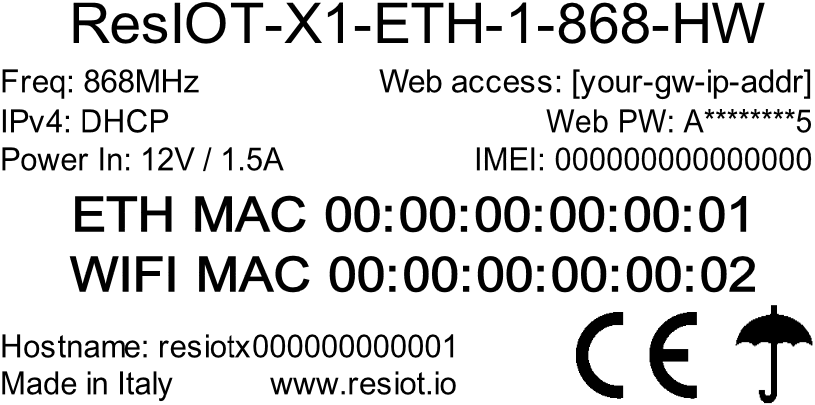
ResIOT® X1 Silver label example
Wifi Connection
No action needed. Proceed with hotspot onboarding. The hotspot is delivered by default in DHCP mode, if you’d like to set up a static IP address please refer to the ‘Network setup‘ section.
Ethernet Connection
The hotspot is delivered by default in DHCP mode. To connect it to the network you just need to plug the Ethernet cable and wait a couple of seconds. If you’d like to set up a static IP address please refer to the ‘Network setup‘ section.
ResIOT® Helium hotspot Onboarding
STEP 1
Download and install the Helium Wallet app. You need a wallet to connect to your hotspots and where receive earnings. Follow the in-app guide during the creation of your wallet


STEP 2
Download and install the ResIOT Helium Hotspot app to quick connect and configure your new ResIOT Helium hotspots. Once installed, proceed with step 3


STEP 3
Follow the ResIOT app guide to configure your hotspot. Below a quick video tutorial about it
ALL DONE!
Your hotspot is now ready! If you like to receive automatic updates for all your devices, monitor the status of your miners and remote access your Helium hotspots, you are looking for our new ResIOT® Helium Hotspot Console!
ResIOT® Helium Hotspot Console
Hotspot Registration and ResIOT® Helium Hotspots Console access
Presentation
Step 1.1
Step 1.2
Step 1.3
Presentation
Full ResIOT® Web console available with Free or Advanced Plans to manage your hotspots and miners, check stats and performance, reports and automatic updates. With ResIOT® Helium Hotspot Console you will have
. 100% FREE Platform included with your hotspot purchase. NO extra costs
. Easy and fast hotspots management and monitor. Bulk actions, administration and maintenance, all inside a unique platform
. REMOTE MANAGEMENT, to access and manage your hotspot from all over the world!
. ADVANCED REPORTS
Step 1.1
Click on this link to access the hotspot registration page (if you don’t have an account, please create a new one on our portal)
Inside your hotspot box you should have received some documents with the RGRA Serial label sticked on them. Keep it next to you because it is necessary for the next step. The label looks like the one on the right.
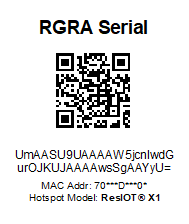
In this example RGRA serial is
UmAASU9UAAAAW5jcnlwdGurOJKUJAAAAwsSgAAYyU=
Step 1.2
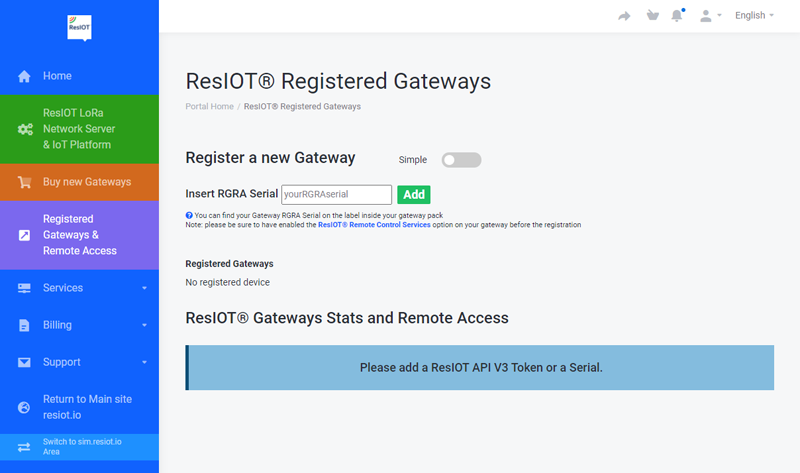
Paste your RGRA Serial inside the proper text box, like in the picture below and press the Add button. You can find your hotspot RGRA Serial on a label pasted on the documents inside your hotspot box. RGRA Serials will keep saved in this page for your account
Step 1.3
You have now successfully registered your device! Click this link to access your ResIOT® Helium Hotspots Console and get your hotspots stats, performance monitor, alerts and notifications, remote management, automatic updates and much more!
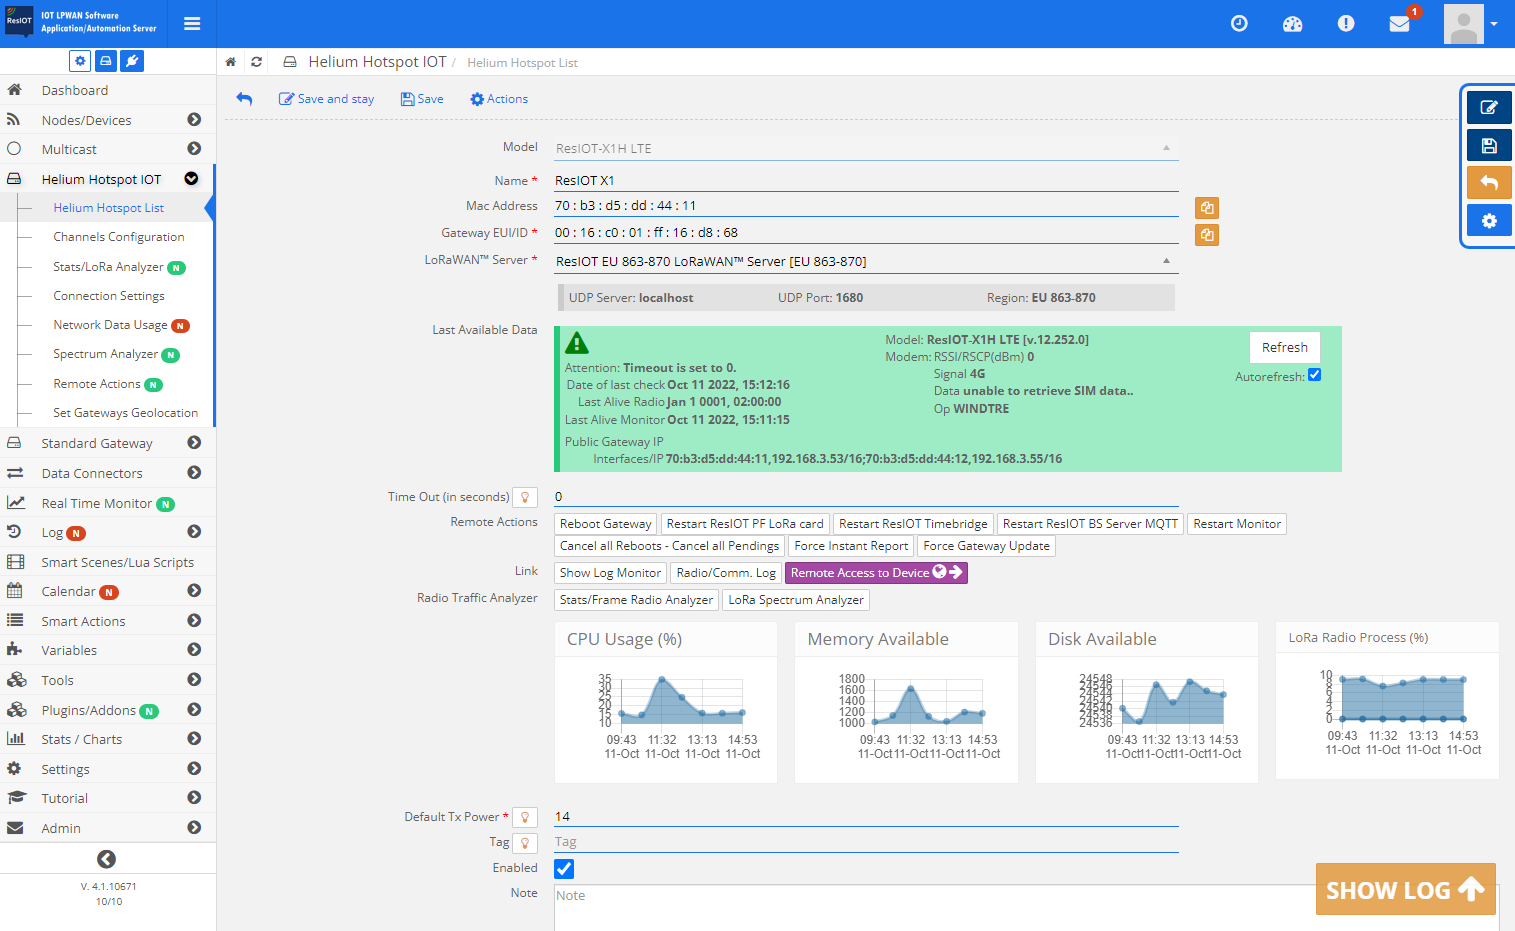
Advanced Hotspot Accessing & Network Configuration
ResIOT® Web Panel access
Step 2.1
Step 2.2
Step 2.3
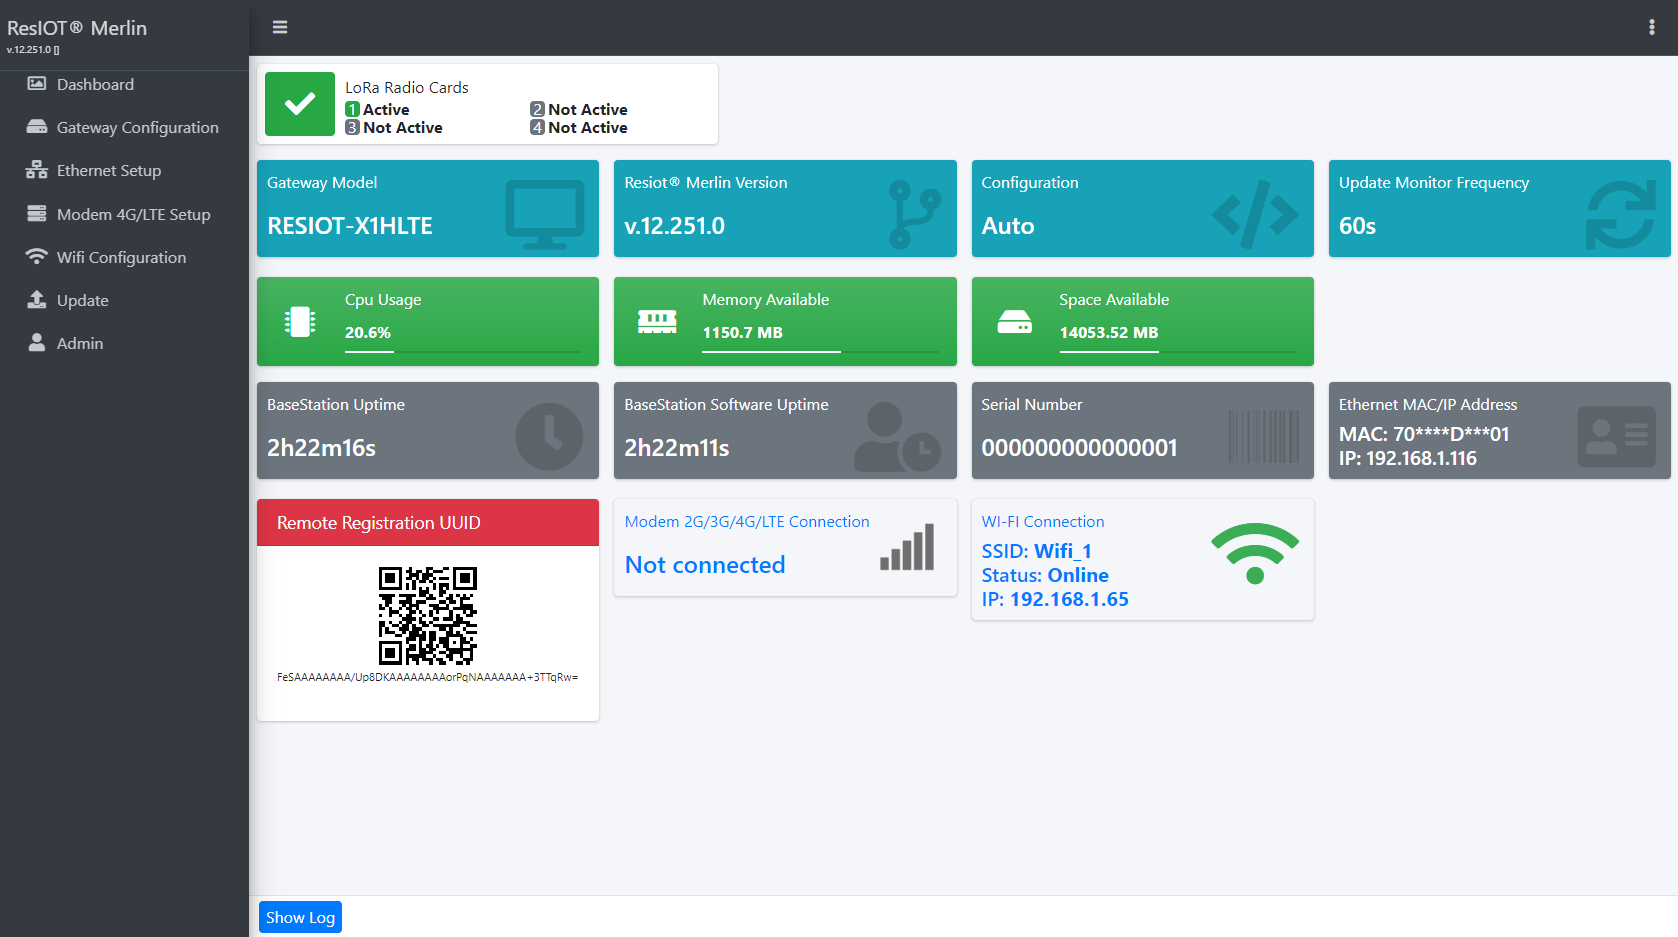
Step 2.1
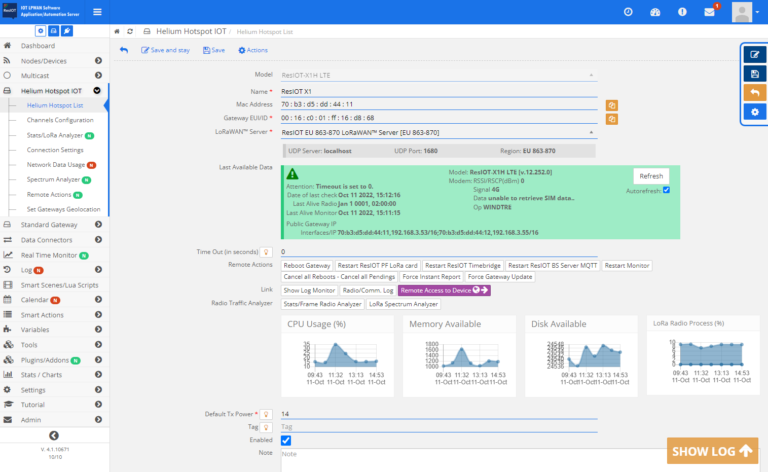
Your hotspot is preconfigured in DHCP mode. Once it is powered up and connected to the network (via wifi or via Ethernet cable) you need to find its new IP address in order to access the configuration panel. The hotspot MAC address can help you to identify the hotspot among your other network devices.
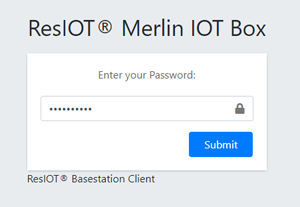
Step 2.2
Open your browser, visit http://[your_hotspot_ip] (example http://192.168.1.116) and enter the web panel password you can find on the hotspot silver label

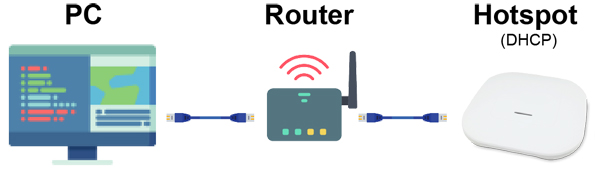
Cabled Connection set up
Step 2.1
Step 2.1
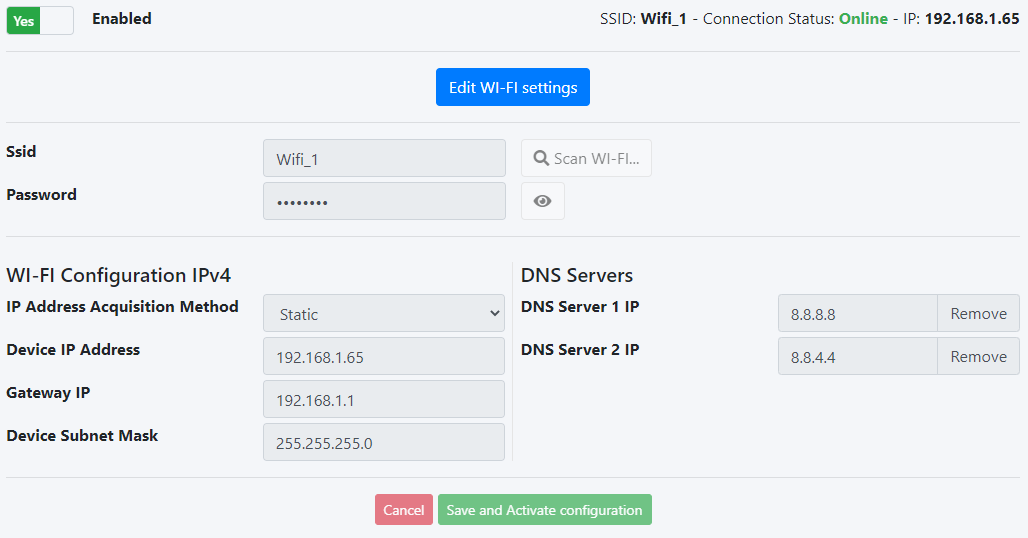
Wifi Configuration
Step 2.1
Step 2.1
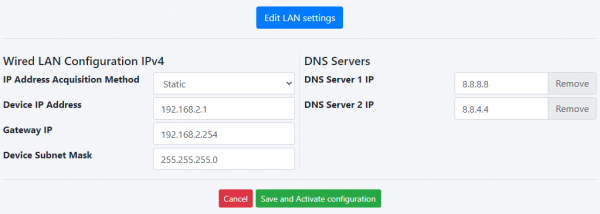
Visit the menu “Wifi Configuration” on the left side of the screen. Press the blue button “Edit WI-FI Settings” at the center of the page to change the Wifi parameters, then fill-in the boxes with your wifi SSID (the wifi name) and password. You can also use the button “Scan WI-FI” to automatically search the available networks. Press “Save and Activate configuration” to confirm the changes and wait few seconds to allow device to apply the new setup. In this example we set up a wifi connection with static IP address
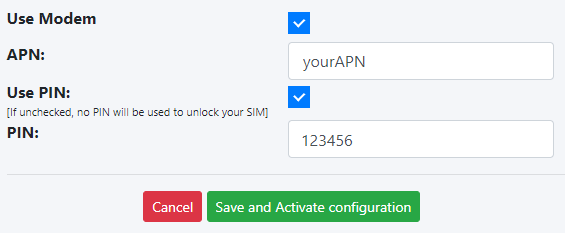
Modem 2G/3G/4G LTE Configuration
Step 2.1
Step 2.1
In case you have a Modem Device, you can setup the connection parameters by visiting the menu “Modem 4G/LTE Setup” on the left side of the screen and fill-in the boxes. Example below